How to Install an In‑Ground Sprinkler System in Houston (2025 Guide)

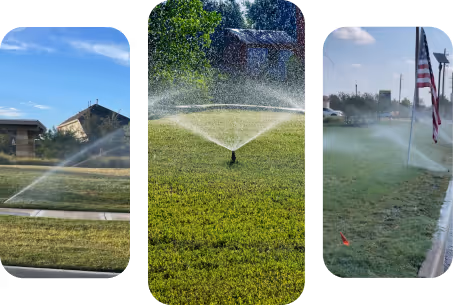
A properly planned in‑ground sprinkler system keeps Houston lawns green while reducing water waste. Below you’ll find the essential installation steps, local cost ranges, materials (PVC vs polyethylene), valve/manifold and backflow requirements in Texas, and when it’s smarter to hire a licensed pro.
Quick Answer: Can I install an in‑ground sprinkler system myself?
Yes, if you’re comfortable trenching, basic plumbing/electrical, and permits. Expect 16–20 hours of labor for a small yard and about $3,000–$5,000 in Houston depending on zones. You must call 811 before digging and install a backflow preventer (required in Texas). Most homeowners DIY layout and heads, then hire a pro to tap the main line and certify backflow.
What You’ll Need (Core Components)
- Controller (timer): Programs days, start times, and per‑zone run time (Wi‑Fi add‑on available).
- Zone valves & manifold: One valve per zone, assembled in a valve box for easy access.
- Backflow preventer: Required in Texas to protect your home’s potable water.
- Pipe: 1" Class‑200 PVC main line; 3/4" laterals are common in Houston. Polyethylene can be used in select cases (see below).
- Sprinkler heads: Pop‑up sprays and rotors with matched precipitation nozzles.
- Fittings & risers: Tees, elbows, couplings, swing joints/flex pipe to each head.
- 24‑V low‑voltage wire for valves; waterproof wire connectors.
- Valve boxes, rain sensor, ball valve (isolation), primer/cement (for PVC).
Pro tip: Ask your installer to show you how to drain the system and isolate it with the ball valve before hard freezes.
PVC vs. Polyethylene Pipe for Irrigation
PVC (Class‑200)
- ✅ Rigid, durable, widely used in Houston clay soils
- ✅ Cleaner glue‑up with primer/cement
- ❌ Requires more fittings/90° turns
Polyethylene (Poly)
- ✅ Flexible—fewer fittings around obstacles
- ✅ Useful where minor ground movement occurs
- ❌ Clamp fittings; can be trickier for beginners
Recommendation: Most Houston residential installs use Class‑200 PVC mains and laterals, with short flex‑swing connections to heads to prevent breakage.
Step‑by‑Step: Sprinkler System Installation (Houston)
1) Plan zones and water capacity
- Measure lawn beds/grass, sun vs. shade, slopes, and hardscapes.
- Confirm static/working pressure (target 40–65 PSI) and flow (GPM) at a hose bibb.
- Create zones so total nozzle GPM per zone ≤ available flow; keep head types consistent per zone.
2) Pull permits, mark utilities, schedule
- Call 811 at least a week before digging to mark gas/electric/telecom.
- Check local rules; many HOAs/cities require backflow testing by a licensed pro.
3) Lay out heads and trenches
- Flag head locations for head‑to‑head coverage (overlap to avoid dry spots).
- Trench 4–8 inches deep in Houston; keep trenches level to avoid low‑point drainage.
4) Tap the water and add isolation
- Shut off house water; install a tee on the service line.
- Add a ball valve to isolate the irrigation system.
- Hire a plumber if you’re not experienced cutting into copper/PEX/PE.
5) Assemble the manifold and zone valves
- Bed the valve box on 2" gravel; build a manifold with one 24‑V valve per zone.
- Run 24‑V wire from controller location to all valves (use waterproof splices).
6) Install the backflow preventer
- Mount per code and manufacturer height/orientation.
- In Houston, protect exposed assemblies from freeze; consider insulated covers.
7) Run the main and lateral piping
- 1" PVC main from backflow to manifold; 3/4" laterals to zone branches.
- Use tees to swing‑joint/flex to each head; minimize sharp turns to reduce friction loss.
8) Set and flush sprinkler heads
- Use pop‑up sprays/rotors matched to area size and plant needs.
- Flush lines before installing nozzles to clear debris.
9) Wire and mount the controller
- Install the controller (often in the garage); connect common and zone wires.
- Optional Wi‑Fi controller automates schedules with weather/rain sensors.
10) Program, test, and backfill
- Program short test cycles; adjust arcs and radii.
- Check for leaks; backfill trenches; set valve box lids flush with grade.
Cost to Install an In‑Ground Sprinkler System in Houston
- 6–8 zones: ~$3,000–$4,000
- 8–10 zones: ~$4,000–$5,000
- 10+ zones / large/complex lots: $5,500+
What affects price? Lot size and shape (corner or cul‑de‑sac), number of valves/zones, head types (rotor vs spray), controller type (Wi‑Fi), and obstacles (driveways, trees, utilities).
Timeline: Typical 6–8 zone systems finish in ~1 day; 12‑zone builds may take 2–3 days (plus the 811 marking lead time).
Sprinkler Zone Valves, Manifold & Wiring (Basics)
- One valve = one zone. Group valves in a central manifold inside a valve box.
- Use common wire daisy‑chain plus individual zone wires (24‑V) from controller.
- Label every wire/valve to simplify future repairs.
Backflow Preventer Installation (Texas Requirement)
- Prevents irrigation water from siphoning into the home supply.
- Installed after the isolation ball valve and before zone valves.
- Must be installed per code/manufacturer and often tested annually by a licensed pro.
- Freeze note: Backflows are the most common freeze failure—learn how to drain/insulate before a hard freeze.
Trenching Depth, Swing Joints & Pop‑Up Heads
- Trenching: 4–8" typical in Houston; deeper where traffic or roots warrant.
- Swing joints/flex: Reduce head damage from mowers/foot traffic.
- Pop‑ups: Set top of cap flush with turf; use matched nozzles for uniform precipitation.
Programming: Water Just Enough (Not More)
- Target 1–2 inches/week across zones; adjust for sun/shade and soil (clay vs. sandy).
- Use cycle‑and‑soak (e.g., 2–3 short runs) to reduce runoff on clay or slopes.
- Add a rain sensor; consider Wi‑Fi scheduling for weather‑based skips.
DIY vs. Hire a Pro in Houston
DIY is reasonable if you:
- Can measure PSI/GPM, map zones, trench, glue PVC, and wire 24‑V valves
- Have time for 16–20 hours of labor and cleanup
Hire a licensed/insured installer if you:
- Prefer a turnkey, 1–2 day install with warranty
- Want a pro to tap the main, install/test backflow, and optimize nozzle layout
- Need financing, senior/military discounts, or Wi‑Fi controller setup
Maintenance & Winterization for Underground Systems
- Inspect heads/nozzles each season for clogs or mis‑aimed sprays.
- Check pressure: misting = too high; dry spots = too low/leaks.
- Freeze prep: Close the ball valve, drain exposed assemblies, and follow your installer’s winterizing steps; large systems may need air blow‑out.
Considering Professional Installation?
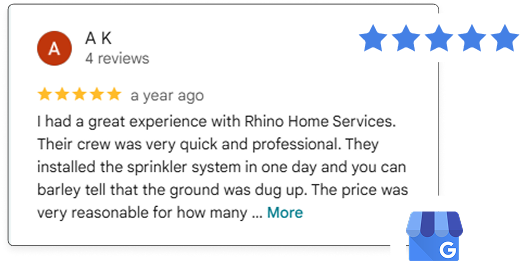
Get a fast, local quote from a licensed, insured Houston irrigation company. Typical installs include controller, wiring, pop‑up/rotor heads, valves, manifold, backflow preventer, materials, labor, 2‑year workmanship warranty, and brief owner training. Call now to schedule your on‑site estimate.
Get a Free Estimate
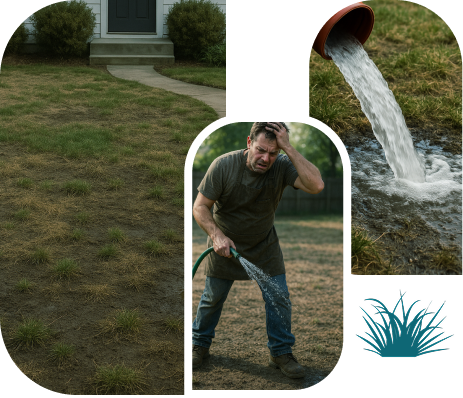
Want a lush lawn without dragging hoses? As top rated sprinkler installers in Houston, we install efficient, code compliant systems backed by a 2‑year warranty, a friendly walkthrough and controller training so you’re confident from day one.
See Exactly What Your Sprinkler System Will Cost
Most times we can get an estimate in less than 24 hours
Frequently Asked Questions
Many localities require permits and backflow testing. Check city/HOA rules before work begins.
4–8 inches in Houston is common; ensure heads retract below mower height.
Most homes use Class‑200 PVC with flex to heads; poly can be used case‑by‑case.
oth PVC and polyethylene (poly) are used for irrigation lines but behave differently underground. PVC is rigid, strong, and common for main and lateral lines in most climates. Polyethylene is flexible and better for areas with shifting soil or freeze-thaw cycles.
DIY installation is possible for technically inclined homeowners who can handle trenching, PVC assembly, and low-voltage wiring. However, hiring a licensed irrigation contractor ensures code compliance, precise zoning, proper backflow installation, and long-term reliability.